Resistance Band Exercises For Full Body: Your Ultimate Guide
Hey there, fitness enthusiasts! Are you looking for a way to get a killer full body workout without needing a gym membership or a room full of bulky equipment? What if I told you that a simple, inexpensive set of elastic bands could be your ticket to building strength, improving muscle tone, and boosting your overall fitness, right from the comfort of your home? Sounds pretty good, right? Well, let’s dive into the wonderful world of resistance band exercises!
Resistance bands might look unassuming, like oversized rubber bands, but trust me, they pack a serious punch. They offer a unique type of resistance that challenges your muscles in ways free weights sometimes can’t. Whether you’re a complete beginner just starting your fitness journey or a seasoned athlete looking to add variety to your routine, resistance bands are incredibly versatile tools. In this guide, we’ll explore everything you need to know to get started and master a fantastic full body workout using only resistance bands.
Why Resistance Bands Are Your New Best Friend for Fitness
So, what’s the big deal with these stretchy bands? Why choose them over dumbbells, kettlebells, or fancy machines? Let’s break down why resistance bands deserve a prime spot in your fitness toolkit.
The Amazing Versatility of Bands
Think of resistance bands as the chameleons of the fitness world. They adapt to almost any exercise you can think of. Need to work your chest? There’s a band exercise for that. Legs feeling neglected? Bands have you covered. Want to target those tricky back muscles? Yep, bands can do that too. You can mimic almost any traditional weightlifting move, from squats and presses to rows and curls, all with a band. Plus, you can easily adjust the resistance by choosing a different band, changing your grip, or altering your distance from the anchor point. This adaptability makes them suitable for virtually any fitness level.
Benefits Beyond the Gym Walls
The advantages of resistance band training go far beyond just building muscle. Here’s a quick rundown:
Portability: They’re incredibly lightweight and compact. Stuff them in your suitcase, backpack, or even your pocket! You can literally take your gym anywhere – the park, a hotel room, your living room. No excuses!
Affordability: Compared to a gym membership or a set of free weights, resistance bands are super budget friendly. You can get a quality set for a fraction of the cost.
Joint Friendly: Bands provide progressive resistance, meaning the tension increases as you stretch the band. This often feels smoother and gentler on the joints compared to the constant force of gravity on free weights. This makes them a great option for people recovering from injuries or those with joint sensitivities.
Constant Tension: Unlike free weights where tension can sometimes drop at certain points in a movement, bands keep your muscles under tension throughout the entire range of motion. This can lead to greater muscle activation and growth.
Functional Strength: Many band exercises mimic real life movements, helping you build strength that translates directly into everyday activities. Think better posture, easier lifting, and improved mobility.
Choosing Your Weapon: Picking the Right Resistance Bands
Okay, you’re sold on the idea. But walk into any sports store or browse online, and you’ll see a dizzying array of bands. Which ones are right for you? Let’s demystify the options.
Types of Resistance Bands Explained
There are a few main types, each with its own strengths:
Loop Bands (The All Rounders)
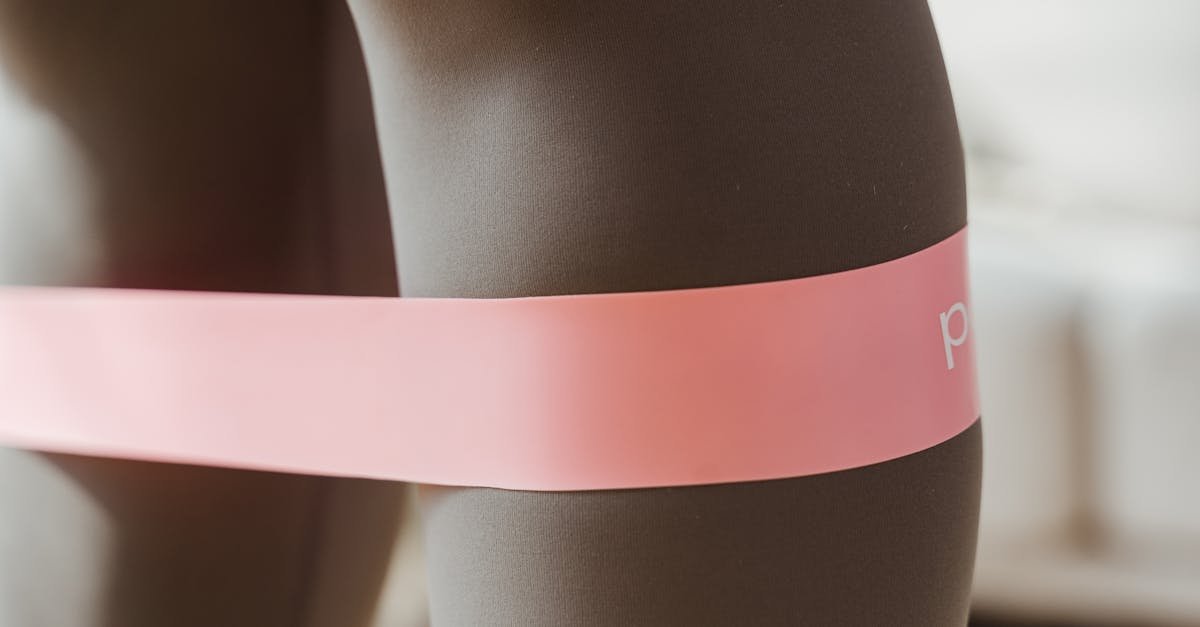
These are continuous loops of flat, elastic material. They often come in sets of varying resistance levels (light, medium, heavy, extra heavy). Mini loop bands are great for activating glutes and hips (think lateral walks, clamshells), while larger loop bands (power bands) are fantastic for assisted pull ups, adding resistance to squats and deadlifts, or performing resisted sprints.
Tube Bands with Handles (Classic Comfort)
These look like surgical tubing with handles attached to each end. They often come with attachments like ankle straps and door anchors, making them super versatile for mimicking cable machine exercises. The handles provide a comfortable grip for presses, rows, curls, and more.
Therapy Bands (Light & Gentle)
These are long, flat strips of latex (or non latex) material, usually without handles or loops. They offer very light resistance and are typically used in physical therapy and rehabilitation settings. They’re excellent for gentle mobility work and targeting smaller muscle groups.
Figure 8 Bands (Targeted Moves)
Shaped like a figure eight, these bands usually have handles on each loop. They are shorter than tube bands and are particularly good for upper body exercises targeting the arms, shoulders, and back, as well as some lower body moves like inner and outer thigh work.
What Resistance Level Do I Need?
Most bands are color coded or labeled to indicate their resistance level (e.g., light, medium, heavy). If you’re a beginner, it’s wise to start with a set that includes multiple levels. This allows you to:
Use lighter bands for smaller muscle groups (like shoulders or triceps) and heavier bands for larger muscle groups (like legs or back).
Progress gradually by moving to a heavier band as you get stronger.
Use lighter bands for warm ups and mobility drills.
A good rule of thumb: choose a resistance level that allows you to complete your target number of repetitions (say, 10 to 15) with good form, feeling challenged by the last few reps but not struggling so much that your form breaks down. It should feel tough, but controlled.
Warming Up: Prepping Your Body for Band Work
Hold on there! Before you jump into stretching those bands, you need to warm up your body. Think of it like revving a car engine on a cold morning – you wouldn’t just floor it, right? A proper warm up increases blood flow to your muscles, improves joint mobility, and mentally prepares you for the workout ahead, reducing the risk of injury.
Aim for 5 to 10 minutes of light cardio followed by dynamic stretching. This could include:
Light cardio: Jogging in place, jumping jacks, high knees, butt kicks.
Dynamic stretches: Arm circles (forward and backward), leg swings (forward/backward and side to side), torso twists, cat cow stretch.
Band specific warm up: You can even use your lightest resistance band for some activation exercises like band pull aparts, banded good mornings, or light banded shoulder rotations.
The goal is to feel warm, slightly looser, and ready to tackle the main workout.
The Ultimate Full Body Resistance Band Workout
Alright, let’s get to the good stuff! Here’s a selection of fantastic resistance band exercises targeting all major muscle groups for a comprehensive full body workout. Remember to focus on controlled movements and maintaining tension on the band throughout each rep.
Upper Body Blasters
Let’s sculpt that upper body!
Banded Push Ups (Chest & Triceps Power)
How to: Drape a large loop band across your upper back, holding the ends under your hands as you assume a standard push up position (hands slightly wider than shoulder width). The band adds resistance as you push up. Lower yourself down slowly, maintaining tension. Too hard? Do them on your knees. Too easy? Use a heavier band or slow down the tempo.
Standing Chest Press (Pec Focus)
How to: Anchor a tube band (or loop band) to a sturdy object behind you at chest height. Grab the handles (or ends of the loop band) and step forward until there’s tension. Start with your hands near your chest, palms facing down or each other. Press forward until your arms are fully extended, squeezing your chest muscles. Slowly return to the starting position. Keep your core engaged!
Overhead Press (Shoulder Sculptor)
How to: Stand on the middle of a tube band or loop band with both feet, shoulder width apart. Hold the handles (or ends of the loop band) at shoulder height, palms facing forward. Press the handles straight up overhead until your arms are fully extended (but not locked). Keep your core tight and avoid arching your back. Slowly lower back down to shoulder height.
Bent Over Rows (Back Builder)
How to: Stand on the middle of your band with feet hip width apart. Hinge at your hips, keeping your back straight (aim for a near parallel position to the floor). Grab the band handles or ends with palms facing each other or your body. Pull the band towards your lower chest, squeezing your shoulder blades together. Imagine pulling your elbows towards the ceiling. Slowly lower back down with control.
Bicep Curls (Arm Definition)
How to: Stand on the middle of the band with one or both feet. Hold the handles or ends with an underhand grip (palms facing forward), arms extended down. Keeping your elbows tucked into your sides, curl the handles up towards your shoulders, squeezing your biceps at the top. Slowly lower back down to the starting position.
Triceps Extensions (Targeting the Back of the Arms)
How to: Anchor the band securely overhead (e.g., top of a door frame using an anchor). Grab the handles or ends with an overhand or neutral grip. Step back slightly. Start with your elbows bent at 90 degrees, close to your head or sides (depending on variation). Extend your arms straight down (or back, for overhead variation), squeezing your triceps. Slowly return to the starting position.
Band Pull Aparts (Upper Back & Posture)
How to: Stand tall, holding a light loop band or therapy band with both hands, shoulder width apart, palms facing down. Keep your arms straight out in front of you at chest height. Pull the band apart by squeezing your shoulder blades together, moving your hands outwards. Keep your arms straight (a slight bend is okay). Pause briefly, then slowly return to the start. This is fantastic for posture!
Lower Body Burners
Time to work those legs and glutes!
Banded Squats (Glutes & Quads Foundation)
How to: Place a loop band around your thighs, just above your knees. Stand with feet shoulder width apart, toes pointing slightly out. Actively push your knees out against the band – this helps activate your glutes. Perform a squat: send your hips back and down as if sitting in a chair, keeping your chest up and back straight. Go as low as you comfortably can while maintaining form. Push through your heels to return to standing, continuing to push your knees out against the band.
Variation: For added resistance, stand on a tube band and hold the handles at shoulder height (like a front squat).
Glute Bridges (Posterior Chain Powerhouse)
How to: Lie on your back with your knees bent and feet flat on the floor, hip width apart. Place a mini loop band around your thighs, just above the knees. Push your knees out against the band. Engage your core and lift your hips off the floor until your body forms a straight line from your shoulders to your knees. Squeeze your glutes hard at the top! Hold for a second, then slowly lower back down.
Standing Kickbacks (Glute Isolation)
How to: Place a mini loop band around your ankles. Stand tall, holding onto a wall or chair for balance if needed. Keeping your core engaged and a slight bend in your supporting leg, extend your other leg straight back, squeezing the glute of the working leg. Keep the movement controlled, avoiding arching your lower back. Return your leg slowly to the starting position. Complete all reps on one side before switching.
Lateral Band Walks (Hip & Glute Activation)
How to: Place a mini loop band around your ankles or just above your knees. Stand with feet hip width apart, knees slightly bent in an athletic stance. Step sideways, maintaining tension on the band throughout the movement. Keep your feet parallel and avoid letting your knees cave inwards. Take several steps in one direction, then repeat in the other direction. You should feel this in your outer glutes and hips.
Banded Hamstring Curls (Targeting the Back of the Legs)
How to: Anchor a tube band or loop band securely near the floor. Lie on your stomach facing away from the anchor point. Loop the band around one ankle (or use an ankle strap). Start with your leg mostly straight. Curl your heel towards your glutes, squeezing your hamstring. Control the movement as you slowly straighten your leg back out against the resistance. Complete reps and switch legs.
Core Crushers
Let’s finish strong by hitting that core!
Banded Dead Bugs (Deep Core Stability Challenge)
How to: Loop a light resistance band around the arches of your feet. Lie on your back with your arms extended towards the ceiling and your knees bent at 90 degrees over your hips (tabletop position). Engage your core, keeping your lower back pressed gently into the floor. Slowly extend one leg straight out, pushing against the band’s resistance, while simultaneously lowering the opposite arm towards the floor behind your head. Keep the core tight and don’t let your back arch. Return to the starting position and repeat on the other side. The band adds an extra challenge to this classic core stabilizer.
Pallof Press (Anti Rotation Strength Builder)
How to: Anchor a band at chest height to your side. Stand perpendicular to the anchor point, feet shoulder width apart, holding the band handle or end with both hands clasped at the center of your chest. Step away from the anchor until there’s good tension trying to pull you sideways. Brace your core tightly. Press the band straight out in front of your chest, resisting the urge to rotate towards the anchor. Hold briefly, then slowly bring your hands back to your chest. Complete reps, then switch sides.
Standing Band Crunches (Abdominal Focus)
How to: Anchor a band securely overhead. Stand facing away from the anchor point (or towards it, depending on preference). Grab the band ends or handles and bring them down beside your head or to your upper chest. Hinge slightly at the hips, then contract your abs to crunch your torso downwards, bringing your elbows towards your knees (if facing away) or simply crunching down (if facing anchor). Focus on using your abs, not your arms or hip flexors. Slowly return to the starting position.
Structuring Your Workout: Sets, Reps, and Rest
Okay, you’ve got the exercises. How do you put them together into a workout? Here’s a simple template:
Frequency: Aim for 2 to 3 full body resistance band workouts per week, allowing at least one day of rest in between for muscle recovery.
Sets: Perform 2 to 4 sets of each exercise. Beginners can start with 2 sets and gradually increase.
Reps: Aim for 10 to 15 repetitions per set for most exercises. For exercises like lateral walks or dead bugs, you might count steps or reps per side. Choose a resistance that makes the last few reps challenging but maintainable with good form.
Rest: Rest for 45 to 90 seconds between sets. Listen to your body – take longer if needed, especially on more demanding exercises.
Order: You can perform all sets of one exercise before moving to the next, or you can structure it as a circuit (performing one set of each exercise in sequence, then repeating the circuit).
Remember to listen to your body! Adjust sets, reps, and resistance as needed. Consistency and proper form are key.
Cool Down and Recovery: Don’t Skip This Crucial Step!
You crushed the workout! But wait, don’t just collapse on the couch yet. A cool down is just as important as the warm up. It helps your heart rate return to normal gradually, improves flexibility, and may help reduce muscle soreness.
Spend 5 to 10 minutes doing static stretches, holding each stretch for 20 to 30 seconds. Focus on the muscles you worked:
Chest stretch (e.g., doorway stretch)
Triceps stretch (arm behind head)
Shoulder stretch (across body)
Quad stretch (heel to glute)
Hamstring stretch (seated or standing toe touch variation)
Glute stretch (figure four stretch)
Back stretch (child’s pose)
Hydration and proper nutrition are also vital parts of recovery. Drink plenty of water and refuel with a balanced meal or snack containing protein and carbohydrates.
Making Progress: How to Keep Challenging Yourself with Bands
Your body is smart. It adapts to the demands placed upon it. To keep seeing results (getting stronger, building muscle), you need to progressively overload your muscles. With resistance bands, you can do this in several ways:
Use a Heavier Band: The most obvious way! Move up to the next level of resistance.
Increase Reps/Sets: Add more repetitions to each set, or add an extra set to your routine.
Decrease Rest Time: Shortening the rest period between sets increases the workout intensity.
Increase Time Under Tension (TUT): Slow down your repetitions, especially the lowering (eccentric) phase. For example, take 3 seconds to lower the weight in a bicep curl.
Combine Bands: Use two bands together for significantly more resistance.
Change Body Position: For exercises where you stand on the band, widening your stance can increase tension. For anchored exercises, stepping further from the anchor point increases resistance.
Keep track of your workouts (exercises, sets, reps, band used) so you can consciously aim to improve over time. Don’t be afraid to push yourself a little harder each week!
Conclusion: Bands – Your Pocket Sized Gym Awaits
So there you have it! Resistance bands are far more than just simple elastic loops. They are powerful, versatile, and incredibly convenient tools for achieving a fantastic full body workout anytime, anywhere. From building strength and improving muscle definition to enhancing mobility and being gentle on your joints, the benefits are numerous. Whether you’re squeezing in a session at home, taking your workout on the road, or adding variety to your existing routine, resistance band exercises offer an effective and accessible way to reach your fitness goals. Grab a set, start incorporating these exercises, stay consistent, and watch yourself get stronger and fitter, one stretch at a time!
FAQs About Resistance Band Training
1. Can you really build muscle with just resistance bands?
Absolutely! Resistance bands provide tension that forces your muscles to adapt and grow, just like weights. The key is progressive overload – consistently challenging your muscles by increasing resistance (using heavier bands, more reps/sets, slower tempo) over time. While they might not be the optimal tool for *maximal* strength like heavy powerlifting, they are highly effective for building functional strength and muscle hypertrophy (growth).
2. How often should I do a full body resistance band workout?
For most people, aiming for 2 to 3 full body resistance band workouts per week is ideal. This frequency allows your muscles enough time to recover and rebuild between sessions, which is crucial for growth and preventing overtraining. Listen to your body and ensure you have at least one full rest day between workouts.
3. Are resistance bands safe for beginners?
Yes, resistance bands are generally very safe for beginners, often safer than free weights initially. They provide accommodating resistance, which tends to be gentler on the joints. Starting with lighter bands allows beginners to focus on learning proper form before increasing the challenge. As always, it’s important to warm up properly and focus on controlled movements.
4. How long do resistance bands last?
The lifespan of resistance bands depends on the quality, frequency of use, and how they are stored. High quality bands can last for years with proper care. Inspect your bands regularly for nicks, tears, or signs of wear. Avoid overstretching them and store them away from direct sunlight or extreme temperatures to prolong their life.
5. Can I combine resistance bands with other types of training?
Definitely! Resistance bands are incredibly versatile and complement other training methods well. You can use them for warm ups before lifting weights, add them to bodyweight exercises (like push ups or squats) for extra challenge, incorporate them into HIIT circuits, or use them for cool down stretches and mobility work. They add a different stimulus that can enhance your overall fitness routine.