At Home Leg Workout For Stronger Glutes: Build Your Best Booty!
Hey there! Are you dreaming of stronger, perkier glutes but find yourself short on time or maybe just not a fan of the gym scene? Guess what? You absolutely don’t need fancy equipment or a pricey gym membership to build some serious strength and shape in your backside. You’ve got the power to sculpt stronger glutes right in the comfort of your own living room! Intrigued? You should be! We’re about to dive deep into an effective at home leg workout specifically designed to target those all important glute muscles.
Forget thinking this is just about aesthetics (though, let’s be honest, that’s a nice bonus!). Building strong glutes is incredibly important for your overall health, movement, and preventing pesky aches and pains. Think of your glutes as the powerhouse of your lower body. Ready to unlock that power? Let’s get started on building your best booty, step by step, right from home.
Why Strong Glutes Matter (More Than Just Looks!)
Okay, let’s talk turkey. Why all the fuss about glutes? Sure, a well developed posterior is often seen as aesthetically pleasing, but the benefits go way beyond looks. Your gluteal muscles (yep, that’s the fancy term) are some of the largest and most powerful muscles in your entire body. They play a critical role in almost everything you do that involves your lower body.
Think about it: standing up from a chair? Glutes. Walking up stairs? Glutes. Running, jumping, even just standing with good posture? You guessed it – glutes! Strong glutes act like a central support system. They help stabilize your pelvis, support your lower back, and power movements like hip extension (moving your leg backward) and abduction (moving your leg sideways).
When your glutes are weak or inactive (sometimes called “gluteal amnesia,” which sounds dramatic but is quite common, especially if you sit a lot), other muscles have to pick up the slack. This often leads to compensation patterns, putting extra strain on your hamstrings, lower back, and even your knees. Ever wonder why your lower back aches after a long day? Weak glutes could be a contributing factor! Strong glutes, on the other hand, can help alleviate back pain, improve athletic performance, reduce the risk of knee injuries, and enhance your overall functional strength. Seriously, they’re kind of a big deal.
Quick Glute Anatomy Refresher: Meet the Muscles
To really target these muscles effectively, it helps to know a little bit about who we’re working with. Your “glutes” aren’t just one big muscle; they’re actually a group of three main players:
Gluteus Maximus: This is the largest of the three and the one most people think of when they hear “glutes.” It’s the main muscle responsible for the shape of your backside and is super powerful for hip extension (think thrusting your hips forward in a bridge or standing up from a squat).
Gluteus Medius: Located more on the side of your hip, this muscle is crucial for hip abduction (moving your leg out to the side) and stabilizing your pelvis, especially when you’re standing on one leg. Think preventing that hip drop when you walk or run. Targeting this helps create that rounded look from the side.
Gluteus Minimus: The smallest and deepest of the three, lying underneath the gluteus medius. It works closely with the medius to help with hip abduction and stabilization.
Knowing these different parts helps understand why we need a variety of exercises. Some moves primarily hit the maximus, while others focus more on the medius and minimus. A well rounded routine hits all three for balanced strength and development. Now, let’s get ready to work them!
Gearing Up: What You Need (and Don’t Need) for Your Home Glute Gains
One of the best things about targeting your glutes at home? You really don’t need a ton of gear! Your own bodyweight is an incredibly effective tool, especially when you focus on proper form and mind muscle connection. Seriously, you can get a fantastic workout with just you and some floor space.
That said, if you want to add a little extra challenge or progress over time, a few simple pieces can be helpful:
Resistance Bands (Loop Bands): These are inexpensive, versatile, and amazing for adding resistance to exercises like glute bridges, squats, and side steps. They really help you feel that glute medius working!
Dumbbells or Kettlebells (Optional): If you have some, great! They can add weight to squats, lunges, and deadlift variations (like Romanian Deadlifts, another great glute builder). But again, totally optional, especially when starting out.
A Mat (Optional but Nice): For comfort during floor exercises like glute bridges and donkey kicks.
A Sturdy Chair or Bench (Optional): Useful for exercises like Bulgarian split squats or elevated glute bridges.
The key takeaway? Start with bodyweight. Master the form. Then, *if* you want, consider adding resistance. Don’t let a lack of equipment be your excuse!
The Crucial Role of a Proper Warm Up
Okay, picture this: you’re eager to start sculpting those glutes, so you jump right into the main workout. Hold on a second! Skipping your warm up is like trying to sprint without stretching – you’re asking for trouble, or at the very least, you’re not getting the most out of your workout. Why? Because your glutes, especially if you sit a lot, might be a bit… sleepy. They need a wake up call!
A proper warm up does several crucial things:
Increases Blood Flow: Gets oxygen rich blood flowing to your muscles, preparing them for work.
Activates Target Muscles: Specific activation exercises help “turn on” your glutes, improving mind muscle connection so you actually *feel* them working during the main exercises. This is key!
Improves Mobility: Dynamic stretches increase your range of motion, allowing you to perform exercises like squats with better depth and form.
Reduces Injury Risk: Gradually preparing your muscles and joints for more intense activity makes them less susceptible to strains or sprains.
Think of it as priming the engine. Spend just 5 to 10 minutes warming up – it’s a small investment that pays huge dividends in results and safety.
Dynamic Stretches to Wake Up Your Glutes
Forget static stretching (holding a stretch for a long time) before your workout. We want dynamic stretches – movements that take your joints and muscles through a range of motion. Here are a few great options to get those glutes firing:
Leg Swings (Forward/Backward & Side to Side): Stand tall, holding onto a wall or chair for balance if needed. Gently swing one leg forward and backward like a pendulum, gradually increasing the height. Do 10 to 15 swings per leg. Then, face the wall and swing the leg side to side across your body.
Walking Lunges (Bodyweight): Take a step forward, lowering your hips until both knees are bent at roughly 90 degree angles. Push off the back foot and step through into the next lunge. Focus on keeping your torso upright. Do 10 to 12 reps total.
Bodyweight Squats: Perform 10 to 15 squats with controlled movement, focusing on pushing your hips back and keeping your chest up.
Glute Bridges (Bodyweight): Lie on your back with knees bent and feet flat. Squeeze your glutes to lift your hips off the floor. Do 15 to 20 reps, really focusing on that glute squeeze at the top.
Cat Cow Stretch: Start on your hands and knees. Inhale as you drop your belly and look up (Cow). Exhale as you round your spine and tuck your chin (Cat). This helps mobilize your spine, which is connected to your pelvis and glutes. Repeat 5 to 8 times.
After these, you should feel warmer, looser, and more connected to those powerhouse muscles!
The Ultimate At Home Glute Workout Routine
Alright, the moment you’ve been waiting for! Let’s get into the exercises that will form the core of your at home glute building routine. Remember, focus on *quality* over quantity. Slow, controlled movements with good form and a strong mind muscle connection are far more effective than rushing through sloppy reps. Feel the burn in the right places!
Exercise 1: The Mighty Glute Bridge
If there’s one foundational exercise for glutes, it’s the glute bridge. It directly targets the gluteus maximus and is fantastic for activation.
How to do it:
Lie flat on your back on your mat. Bend your knees and place your feet flat on the floor, about hip width apart, fairly close to your glutes (you should be able to roughly touch your heels with your fingertips). Let your arms rest by your sides, palms down.
Engage your core slightly to keep your back stable.
Push through your heels and squeeze your glutes powerfully to lift your hips off the floor until your body forms a straight line from your shoulders to your knees. Avoid arching your lower back excessively – the movement should come from your hips/glutes.
Hold the top position for a second or two, really focusing on that intense glute contraction. Imagine you’re trying to crack a walnut between your cheeks!
Slowly lower your hips back down to the starting position with control.
Repeat for your desired number of reps (aim for 12 to 20 reps for 3 to 4 sets).
Common Mistakes: Arching the lower back too much (focus on glute squeeze), pushing through the toes instead of heels, not lifting high enough (or lifting too high using the back), and not controlling the lowering phase.
Glute Bridge Variations: Spice It Up!
Once the basic bridge feels comfortable, try these:
Single Leg Glute Bridge: Perform the bridge as above, but lift one leg straight up towards the ceiling or keep it bent with the knee towards your chest. This drastically increases the challenge for the working glute and improves stability. Keep your hips level!
Elevated Glute Bridge: Place your feet on a low step, sturdy chair, or sofa. This increases the range of motion, allowing for a deeper glute stretch at the bottom and potentially greater activation.
Banded Glute Bridge: Place a resistance band loop just above your knees. Actively push your knees outwards against the band throughout the movement. This adds resistance and fires up the gluteus medius like crazy!
Weighted Glute Bridge: If you have a dumbbell or weight plate, rest it across your hips for added resistance.
Exercise 2: Squats – Mastering the Glute Focused Form
Squats are often hailed as the king of leg exercises, and for good reason! While they work your quads and hamstrings too, you can definitely emphasize the glutes with proper form.
How to do it (Glute Focus):
Stand with your feet slightly wider than hip width apart, toes pointing slightly outwards (find a comfortable stance). Keep your chest up and core engaged.
Initiate the movement by pushing your hips back, as if you’re about to sit in a chair far behind you. This hinge at the hips is key for glute engagement.
Lower yourself down, keeping your back straight (neutral spine) and chest lifted. Aim to get your thighs at least parallel to the floor, or even slightly lower if your mobility allows *without* rounding your lower back.
Ensure your knees track in line with your toes – don’t let them cave inwards.
Drive powerfully through your heels to stand back up, squeezing your glutes hard at the top. Think about pushing the floor away from you.
Repeat (aim for 10 to 15 reps for 3 to 4 sets).
Key for Glutes: Focus on the hip hinge initiation, achieving good depth, driving through the heels, and the powerful glute squeeze at the top.
Squat Variations for Deeper Glute Engagement
Sumo Squat: Take a much wider stance with toes pointed out more (like a sumo wrestler). This variation tends to hit the glutes and inner thighs more intensely. Keep your torso as upright as possible.
Bulgarian Split Squat: This is a single leg squat variation. Place the top of your back foot on a chair or bench behind you. Your front foot should be far enough forward so that when you lower down, your front knee stays roughly over your ankle. Lower straight down until your front thigh is parallel to the floor. This is fantastic for isolating the glute of the front leg and challenges your balance.
Goblet Squat: Hold a single dumbbell or kettlebell vertically against your chest. This helps you maintain an upright torso and can allow for greater depth, often leading to better glute activation.
Banded Squat: Place a resistance band loop just above or below your knees and actively push outwards against it as you squat. This helps engage the glute medius.
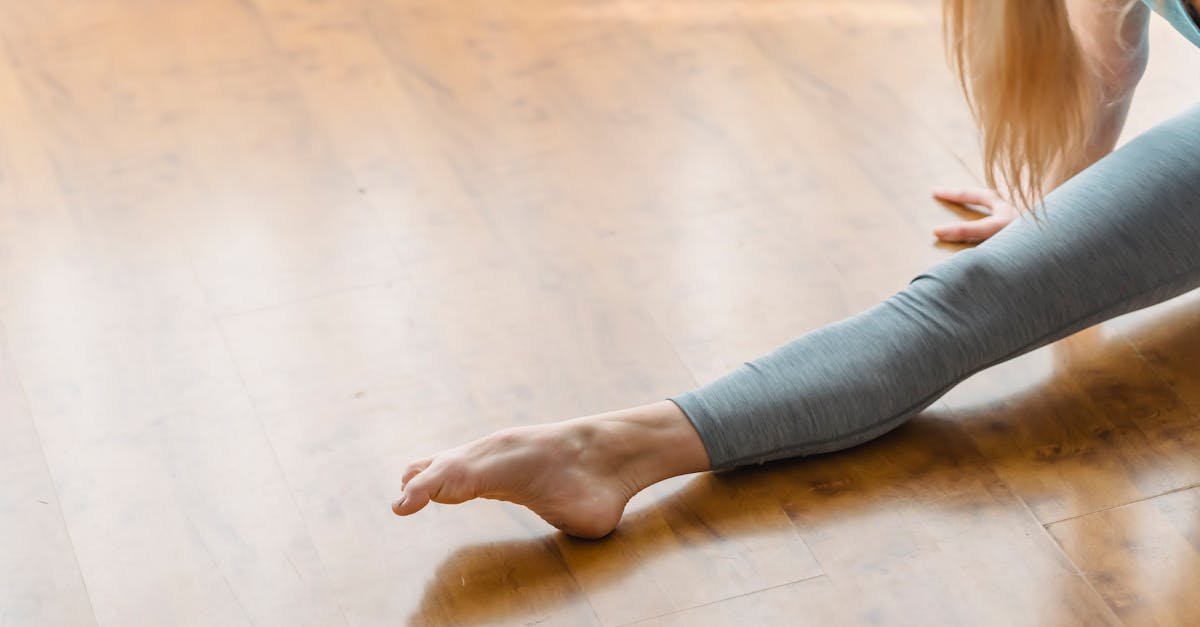
Exercise 3: Lunges – The Unsung Heroes (Forward, Reverse, and Lateral)
Lunges are phenomenal unilateral (single leg) exercises that challenge balance, stability, and, you guessed it, your glutes!
Types & How To:
Forward Lunge: Step forward with one leg, lowering your hips until both knees are bent at about 90 degrees. Your front knee should be over your ankle, and your back knee should hover just above the floor. Push off your front foot to return to the starting position. Alternate legs or do all reps on one side before switching.
Reverse Lunge: Step *backward* with one leg, lowering into the lunge position. Push off your *front* foot to return to standing. Many people find reverse lunges slightly easier on the knees and feel a better glute stretch.
Lateral (Side) Lunge: Step directly out to the side with one leg, keeping the other leg straight. Push your hips back and bend the knee of the stepping leg, keeping your foot flat on the floor. You should feel a stretch in your inner thigh (adductor) of the straight leg and work the glutes of the bent leg. Push off the bent leg to return to the center. Alternate sides.
Glute Tip: For all lunges, focus on pushing through the heel of the front/working foot to stand up. Taking a slightly longer stride can sometimes increase glute involvement. Aim for 10 to 12 reps per leg for 3 sets.
Exercise 4: Isolation Station – Donkey Kicks & Fire Hydrants
While compound moves like squats and lunges are essential, adding some isolation exercises can help you really focus on specific glute muscles and build that mind muscle connection.
How to do it:
Donkey Kicks: Start on all fours (hands under shoulders, knees under hips), core engaged, back flat. Keeping your knee bent at 90 degrees, lift one leg straight back and up, flexing your foot and pushing your heel towards the ceiling. Focus solely on squeezing the glute of the working leg. Avoid arching your back; the movement should come from the hip. Lower with control. Do 15 to 20 reps per side for 2 to 3 sets.
Fire Hydrants: From the same all fours position, keep your knee bent at 90 degrees and lift one leg directly out to the side, like a dog at a fire hydrant (hence the name!). Try to keep your pelvis stable and avoid leaning too much to the opposite side. Focus on using your outer glute (gluteus medius/minimus). Lower with control. Do 15 to 20 reps per side for 2 to 3 sets.
Tip: You can add a resistance band loop around your thighs (just above the knees) for extra challenge on both of these exercises.
Putting It All Together: Your Weekly Glute Plan
So, you’ve got the exercises, but how do you structure them into a workout? Here’s a sample approach. Remember, consistency is key!
Frequency: Aim to do this dedicated glute focused workout 2 to 3 times per week, ensuring you have at least one full rest day in between sessions to allow your muscles to recover and grow. For example, you could train on Monday and Thursday, or Tuesday, Thursday, and Saturday.
Sample Workout Structure:
Warm up: (5 to 10 minutes) Dynamic stretches like leg swings, bodyweight squats, glute bridges.
Glute Bridges: 3 sets of 15 to 20 reps (choose a variation if needed).
Squats: 3 sets of 10 to 15 reps (choose bodyweight or a variation).
Lunges: 3 sets of 10 to 12 reps *per leg* (choose forward, reverse, or mix it up).
Donkey Kicks: 2 sets of 15 to 20 reps per leg.
Fire Hydrants: 2 sets of 15 to 20 reps per leg.
Cool Down (Optional but Recommended): Gentle static stretching, holding each stretch for 20 to 30 seconds. Focus on glute stretches (like figure four stretch) and hip flexor stretches.
Progressive Overload: To keep making progress, you need to gradually challenge your muscles more over time. You can do this by:
Increasing the number of reps or sets.
Decreasing rest time between sets.
Adding resistance (bands, weights).
Choosing more challenging exercise variations.
Improving your form and range of motion.
Slowing down the tempo (especially the lowering phase).
Listen to your body and make small, consistent increases in difficulty.
Listen To Your Body: The Power of Rest and Recovery
It might sound counterintuitive, but muscle growth actually happens during rest, not during the workout itself. When you train, you create tiny micro tears in your muscle fibers. During recovery, your body repairs these tears, making the muscles stronger and slightly bigger than before. This is why rest days are non negotiable!
Overtraining can lead to fatigue, burnout, decreased performance, and even injury. Signs you might need more rest include persistent soreness, trouble sleeping, decreased motivation, or hitting a plateau in your progress. Don’t push through excessive pain. Muscle soreness (Delayed Onset Muscle Soreness or DOMS) is normal, especially when starting, but sharp or persistent pain is not. Give your glutes the time they need to rebuild – typically 48 to 72 hours between intense sessions targeting the same muscle group.
Fueling Your Glutes: Nutrition for Muscle Growth
You can do all the glute bridges in the world, but if your nutrition isn’t supporting muscle repair and growth, your results will be limited. You don’t need a super strict or complicated diet, but focusing on a few key principles can make a big difference.
Protein Power: Protein is the building block of muscle tissue. Ensure you’re getting enough protein throughout the day to support recovery and growth. Good sources include lean meats (chicken, turkey, beef), fish, eggs, dairy (Greek yogurt, cottage cheese), legumes (beans, lentils), tofu, and protein powder if needed. Aim to include a protein source in most of your meals.
Carbs for Energy: Carbohydrates are your body’s primary energy source. They fuel your workouts and replenish glycogen stores afterwards. Choose complex carbohydrates like whole grains (oats, brown rice, quinoa), fruits, and vegetables for sustained energy.
Healthy Fats: Fats are important for hormone production and overall health. Include sources like avocados, nuts, seeds, and olive oil.
Hydration: Don’t forget water! Staying hydrated is crucial for muscle function, recovery, and overall bodily processes.
Overall Calorie Intake: To build muscle (hypertrophy), you generally need to be in a slight calorie surplus (consuming slightly more calories than you burn). However, even if your goal isn’t significant size increase, adequate calories and particularly sufficient protein are needed to support strengthening and toning.
Think of it as providing the raw materials your body needs to build those stronger glutes you’re working so hard for!
Oops! Common Mistakes to Sidestep on Your Glute Journey
It’s easy to fall into a few common traps when working on your glutes at home. Being aware of these can help you stay on track and maximize your results:
Poor Form Over Speed/Weight: This is the biggest one! Rushing through reps or using momentum instead of muscle control won’t effectively target your glutes and increases injury risk. Focus on slow, controlled movements and feeling the muscle work. Film yourself if it helps!
Not Engaging the Glutes (Mind Muscle Connection Fail): Are you just going through the motions, or are you actively *squeezing* your glutes? Before each rep, consciously think about the muscle you’re trying to work. Place your hand on your glute during bridges or donkey kicks if it helps you feel the contraction.
Skipping the Warm Up/Activation: As we discussed, sleepy glutes won’t work effectively. Always include glute specific activation exercises in your warm up.
Only Doing Squats: Squats are great, but they aren’t the *only* glute exercise. Include variety like bridges, lunges, and abduction movements (fire hydrants, banded side steps) to hit all parts of the glutes.
Neglecting Progressive Overload: Doing the same routine with the same reps/resistance forever will lead to a plateau. You need to continually challenge your muscles in small ways.
Inconsistency: Working out sporadically won’t yield the results you want. Aim for consistency with your 2 to 3 sessions per week.
Ignoring Recovery: Not getting enough sleep or rest days hinders muscle growth and increases burnout risk.
Expecting Overnight Results: Building muscle takes time and patience. Don’t get discouraged if you don’t see dramatic changes in a week. Stay consistent, focus on progress, and celebrate the small wins!
Avoiding these pitfalls will set you up for much greater success in building those strong, functional glutes.
Conclusion: Building Your Strongest Glutes, Right From Home
So there you have it! A comprehensive guide to building stronger, more powerful glutes without ever having to leave your home. We’ve covered why strong glutes are so important (way beyond just looks!), the basic anatomy, how to warm up effectively, and a killer routine featuring foundational exercises like glute bridges, squats, lunges, and isolation moves. We also touched on the importance of progressive overload, proper nutrition, rest, and avoiding common mistakes.
Remember, the most effective workout is the one you stick with. Start where you are, focus on mastering the form, and gradually increase the challenge. Listen to your body, fuel it properly, and be patient with the process. Building strength takes time, but the rewards – improved posture, reduced pain, enhanced performance, and yes, a perkier posterior – are well worth the effort. You have all the tools you need. Now go forth and build those amazing glutes!
Frequently Asked Questions (FAQs)
1. How long will it take to see results from this at home glute workout?
Results vary depending on factors like genetics, starting point, consistency, intensity, and nutrition. However, with consistent effort (2 to 3 times per week) and proper form, you might start *feeling* stronger within a few weeks. Visible changes often take longer, typically 6 to 12 weeks or more. Patience and consistency are key!
2. Can I do this workout every day for faster results?
It’s generally not recommended to train the same muscle group intensely every single day. Your glutes need time to recover and rebuild (usually 48 to 72 hours). Overtraining can hinder progress and increase injury risk. Stick to 2 to 3 dedicated sessions per week, allowing for rest days in between.
3. I don’t feel the exercises in my glutes, mostly my thighs. What am I doing wrong?
This is common! Focus intently on mind muscle connection. Slow down the reps, especially the squeeze/contraction phase. Make sure you’re initiating movements like squats with a hip hinge (pushing hips back). Incorporate activation exercises in your warm up (like bodyweight glute bridges focusing on the squeeze). For squats and lunges, ensure you’re driving through your heels. You might also need to adjust your stance or depth.
4. Do I need weights to build strong glutes at home?
No, you can absolutely build significant glute strength using just your bodyweight and resistance bands. Mastering bodyweight exercises with perfect form, high reps, and variations like single leg movements provides plenty of challenge. Weights can be added later for progressive overload, but they aren’t essential, especially initially.
5. My knees hurt when I do squats or lunges. What should I do?
First, ensure your form is correct: knees tracking over toes, not caving inward, and not extending too far past your toes (especially in lunges). Try reverse lunges, which are often gentler on the knees. Ensure your glutes are properly activated before starting, as weak glutes can contribute to knee strain. If pain persists, stop the exercise causing pain, focus on pain free alternatives like glute bridges and donkey kicks, and consider consulting a physical therapist to check your form and address potential underlying issues.